Image Classification
In this tutorial, you will build an app that can take pictures and classify objects in each image using an on-device image classification model.
Viewing this Demo
In order to view this demo download the PlayTorch app.
Preview
If you want a sneak peek at what you'll be building, run this Snack by scanning the QR code in the PlayTorch app!
Overview
We'll go through the following steps:
- Create a new project with Snack by Expo
- Run the project in the PlayTorch app
- Add PlayTorch dependencies
- Add a camera view
- Process an image
- Run a model
- Display results
Starting a New Project
We will be using a tool called Snack by Expo to write our code in the browser and then run it on our device. To learn more about Snack, visit this link.
Open a new tab in your web browser and navigate to snack.expo.dev.
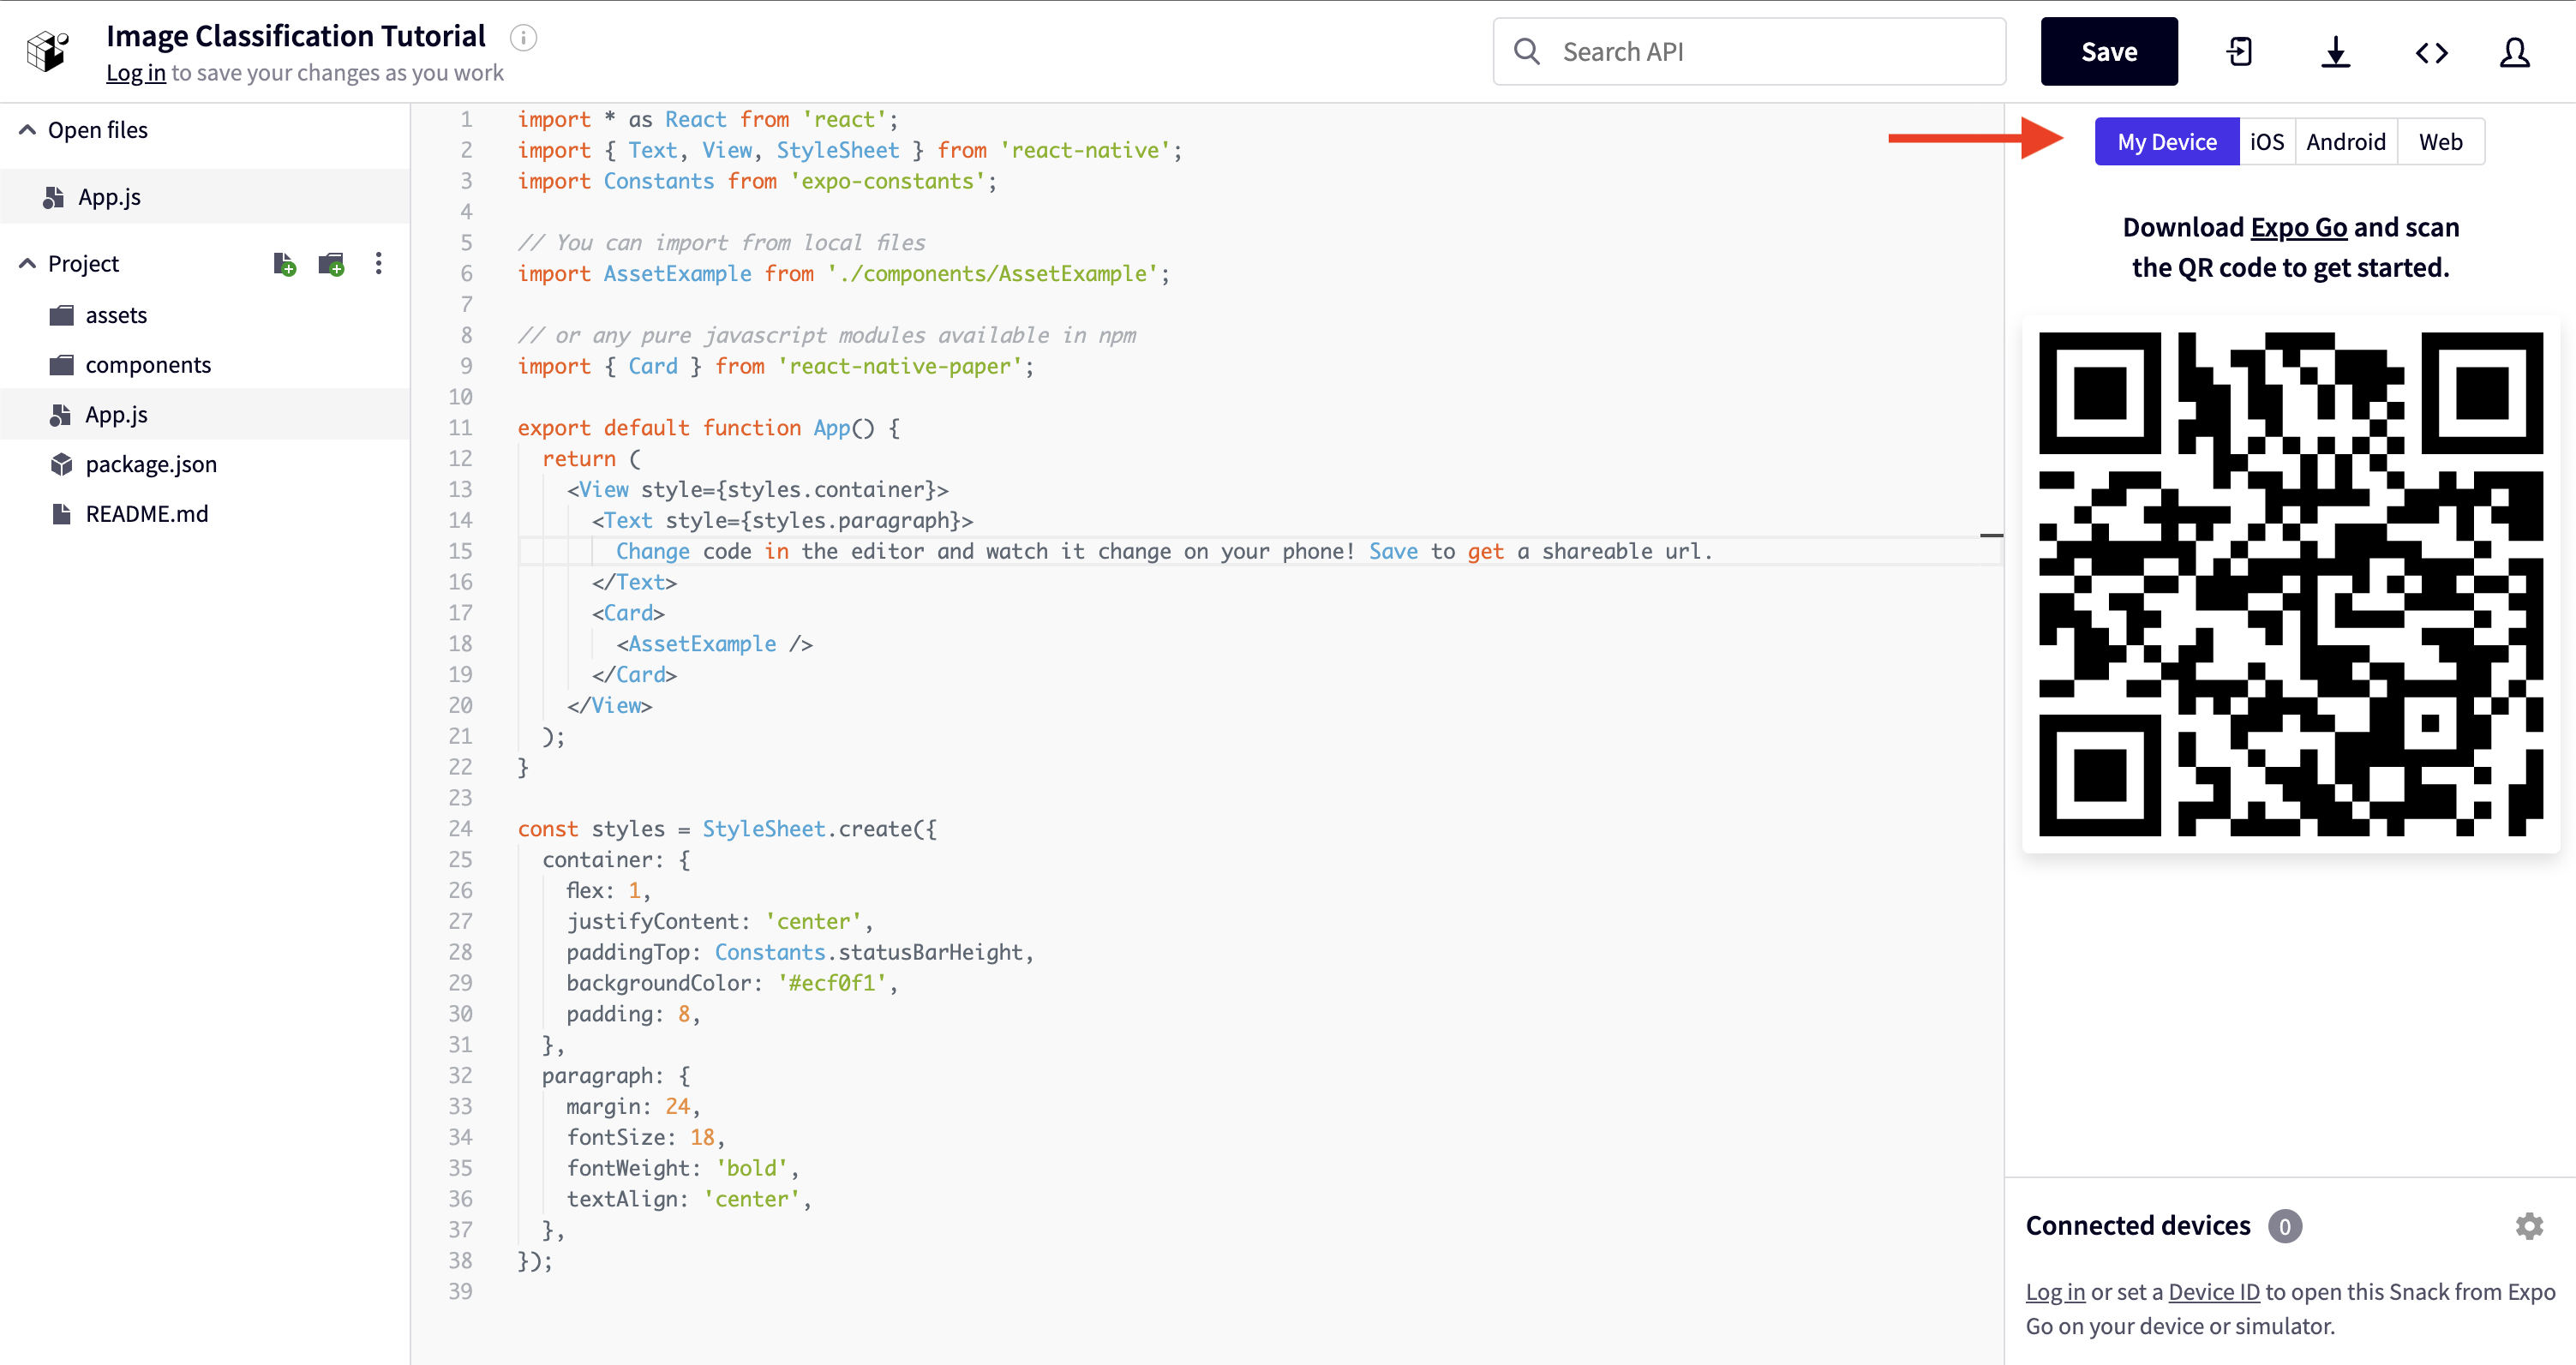
You will see a code editor with the App.js file open. On the right side of the window, you will see several options for running your code. It defaults to "Web", but let's select "My Device" so we can use the PlayTorch app to enable ML in our app.
Run the New Project
Open the PlayTorch app and from the home screen, tap "Scan QR Code".
If you have never done this before, it will ask for camera permissions. Grant the app camera permissions and scan the QR code from the right side of the Snack window.
If you haven't made any changes to the snack, you should see a screen that looks like this:
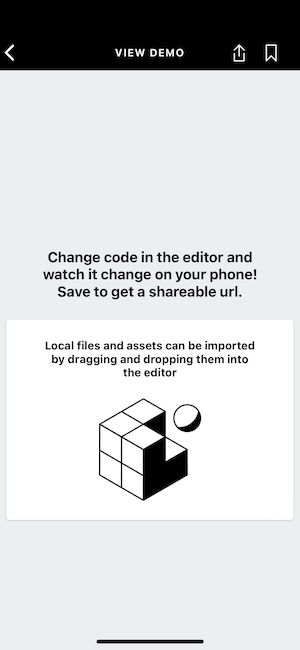
Try changing the backgroundColor to #800080 on line 29 and you will see that your app screen changes in real time to match it.
Add PlayTorch Dependencies
In order to add ML to this simple demo, we first need to add the PlayTorch dependencies.
In the left side of the Snack window, you will see a list of the files being used in your Snack. Open the one called package.json and replace the contents with the following:
{
  "dependencies": {
    "react-native-pytorch-core": "0.2.0",
    "react-native-safe-area-context": "3.3.2"
  }
}
This is a list of external libraries that we will be using to build our ML powered demo.
Add a Camera View
Now that we have the extra dependencies loaded, we can use them to prepare our user interface for collecting images to classify.
Go ahead and replace the contents of App.js with the following. Let's walk through what changes are included:
- Import dependencies. It's worth noting we import the Camera component from the
react-native-pytorch-corepackage. That is the core PlayTorch SDK - Update the App function to render our new UI
- Get the "safe area insets" which let us know how much of the screen we can actually use to render avoiding camera notches and bottom bars.
- Make the Camera view fill the whole screen except for the unsafe areas on the bottom so the capture button doesn't get obscured
- Create a label container for when we begin classifying images that floats near the top
- Create a styles object that is used to set the styles for or label container
// 1. Import dependencies
import * as React from 'react';
import {StyleSheet, Text, View} from 'react-native';
import {Camera} from 'react-native-pytorch-core';
import {useSafeAreaInsets} from 'react-native-safe-area-context';

// 2. App function to render a camera and a text
export default function App() {
  // 2.i. Safe area insets to compensate for notches and bottom bars
  const insets = useSafeAreaInsets();
  return (
    <View style={StyleSheet.absoluteFill}>
      {/* 2.ii. Render camara and make it parent filling */}
      <Camera style={[StyleSheet.absoluteFill, {bottom: insets.bottom}]} />
      {/* 2.iii. Label container with custom render style and a text */}
      <View style={styles.labelContainer}>
        <Text>Label will go here</Text>
      </View>
    </View>
  );
}

// 3. Custom render style for label container
const styles = StyleSheet.create({
  labelContainer: {
    padding: 20,
    margin: 20,
    marginTop: 40,
    borderRadius: 10,
    backgroundColor: 'white',
  },
});
Once you make these changes, open the Snack back up in the PlayTorch app and you will see the camera view filling the screen and our label container with a placeholder label.
Notice clicking the capture button doesn't do anything yet. Let's fix that.
The added lines below do the following:
- Create an async (runs in the background) function called
handleImagethat simply:- Logs the image object passed to it
- Releases the image from memory. Not calling
image.release()will result in the camera not providing an image on consecutive presses of the capture button. The only way to fix this is to force close the PlayTorch app and reopen it.
- Set the
handleImagefunction to be called everytime an image is captured by theCameracomponent
// Import dependencies
import * as React from 'react';
import {StyleSheet, Text, View} from 'react-native';
import {Camera} from 'react-native-pytorch-core';
import {useSafeAreaInsets} from 'react-native-safe-area-context';

// App function to render a camera and a text
export default function App() {
  // Safe area insets to compensate for notches and bottom bars
  const insets = useSafeAreaInsets();

  // 1. Function to handle images whenever the user presses the capture button
  async function handleImage(image) {
    // 1.i. Log the image object to the console
    console.log(image);
    // 1.ii. Release the image from memory
    image.release();
  }

  return (
    <View style={StyleSheet.absoluteFill}>
      {/* Render camara and make it parent filling */}
      <Camera
        style={[StyleSheet.absoluteFill, {bottom: insets.bottom}]}
        // 2. Add handle image callback on the camera component
        onCapture={handleImage}
      />
      {/* Label container with custom render style and a text */}
      <View style={styles.labelContainer}>
        <Text>Label will go here</Text>
      </View>
    </View>
  );
}

// Custom render style for label container
const styles = StyleSheet.create({
  labelContainer: {
    padding: 20,
    margin: 20,
    marginTop: 40,
    borderRadius: 10,
    backgroundColor: 'white',
  },
});
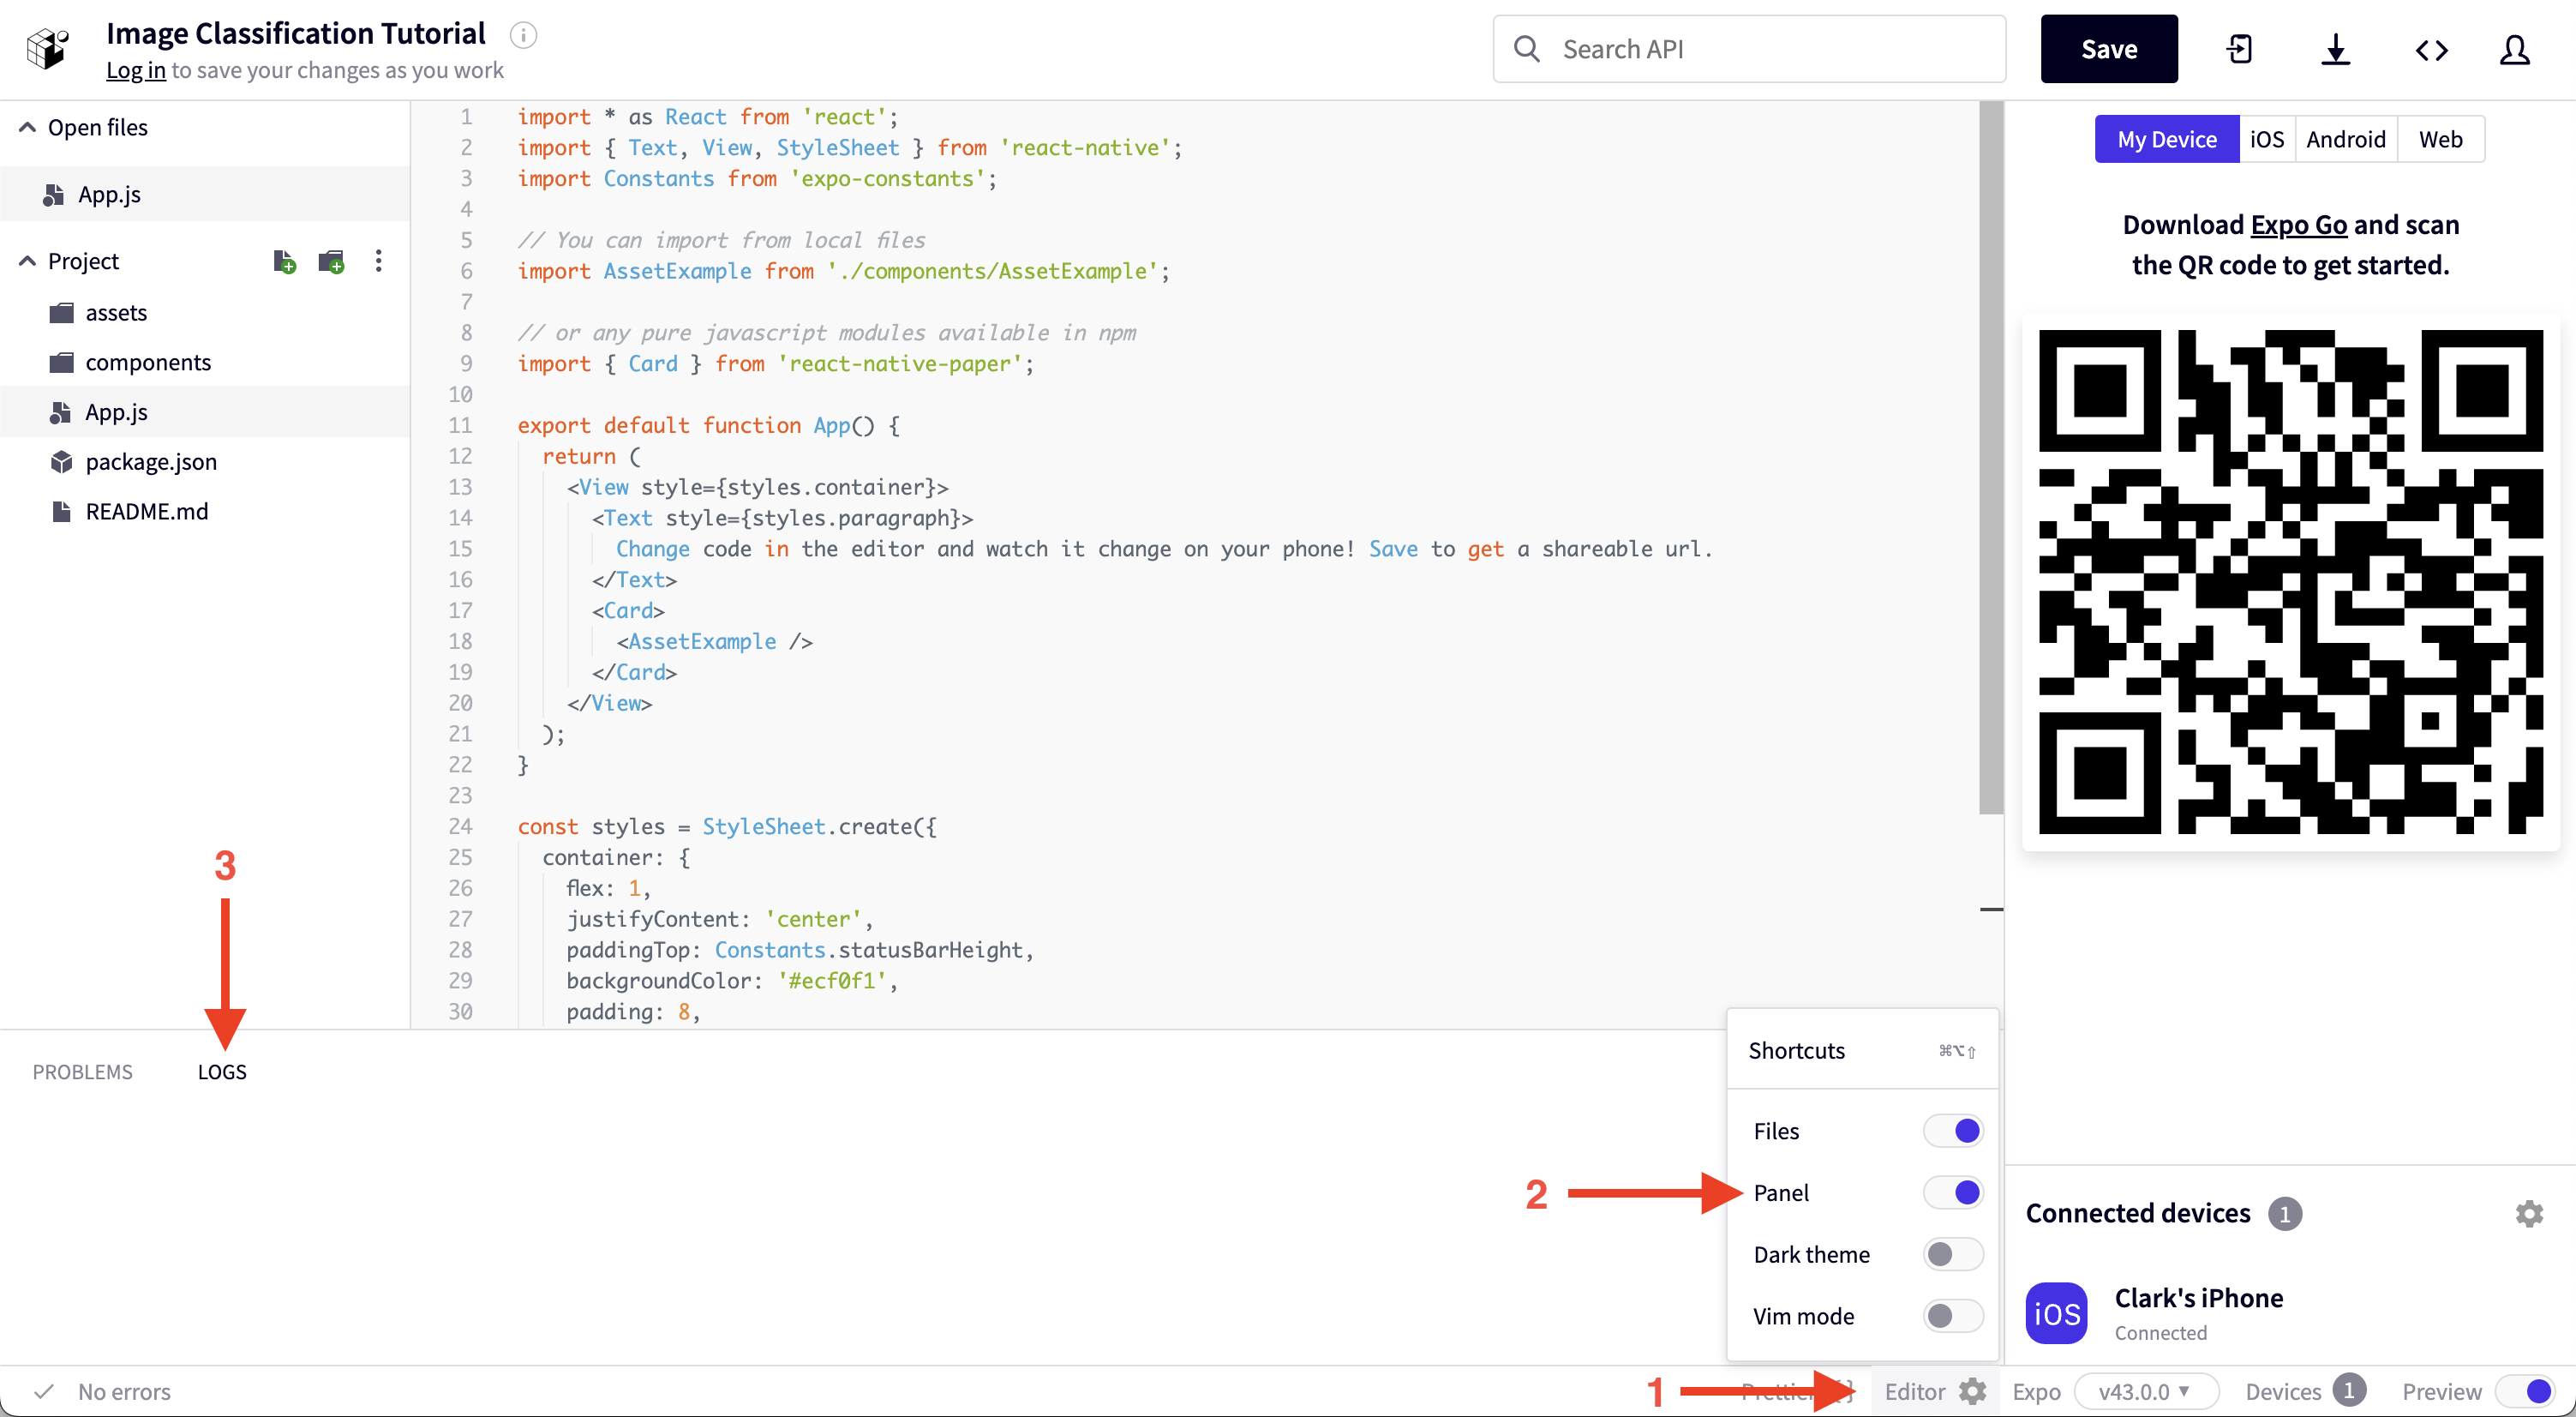
Open the logs in the Snack window by clicking the settings gear icon at the bottom of the window, enabling the Panel, and clicking the logs tab of the newly opened panel.
After taking a picture, you should see a logged object with an ID field.
Now that we can capture images, let's write some code to prepare them for machine learning!
Process an Image
In order for us to run machine learning on our image to classify it, we first need to translate it to a format that the ML model understands.
ML models don't work with images, but with tensors (multi dimensional matrices) with their own specific data format.
The MobileNet model that we will be using only needs its image data in its tensors to be exactly 224 by 224 with normalized data and a specific shape.
Let's create a new file by clicking the new file button in the left pane of the Snack window. We'll call it ImageClassifier.js
Let's walk through the code below to see how we get our image converted to a proper tensor:
- Import
torch,torchvision, andmediafrom thereact-native-pytorch-corepackage (the PlayTorch SDK) - Create an alias called
Tfor thetransformsobject from thetorchvisionto make it shorter to access the transform functions - Create an async function called
classifyImagethat takes in an image and does the following:- Grab the
widthand theheightof the image - Create a
blobof the image (a blob is just a raw data representation of something). In this case, the blob holds a byte representation of the image in the format height, width, and channels, or HWC for short. - Create a
tensorfrom the blob with the shape height by width by channels (RGB). It is important that the order of HWC is aligned with the byte representation of the image. - Rearrange the tensor shape to be channels (RGB) by height by width. This is important because the image classifiation model that is used in this tutorial requires the tensor shape to be in this order.
- Divide all of the values in the tensor by 255. This is important because the image classification model requires the tensor values to be between
[0, 1]. - Center crop the image data within the tensor. The center crop will result in a squared image tensor with the shortest side defining the size.
- Resize the tensor to
3by224by224(or tensor shape[3, 224, 224]) to match the size the model expects as tensor input format. - Normalize the tensor image with mean and standard deviation.
- Add one more leading dimension to the tensor to be in the shape
1by3by224by224(or tensor shape[1, 3, 224, 224]). The image classification model can classify multiple images in parallel. The leading1represents the batch size, which is1because in this tutorial it only needs to process one image at a time. - Return the shape of the tensor, which is
[1, 3, 224, 224].
- Grab the
// 1. Import torch, torchvision, and media from PlayTorch SDK
import {torch, torchvision, media} from 'react-native-pytorch-core';

// 2. Alias for torchvision transforms
const T = torchvision.transforms;

// 3. The classifyImage function that will process an image and return the top
// class label
export default async function classifyImage(image) {
  // 3.i. Get image width and height
  const width = image.getWidth();
  const height = image.getHeight();

  // 3.ii. Convert image to blob, which is a byte representation of the image
  // in the format height (H), width (W), and channels (C), or HWC for short
  const blob = media.toBlob(image);

  // 3.iii. Get a tensor from image the blob and also define in what format
  // the image blob is.
  let tensor = torch.fromBlob(blob, [height, width, 3]);

  // 3.iv. Rearrange the tensor shape to be [CHW]
  tensor = tensor.permute([2, 0, 1]);

  // 3.v. Divide the tensor values by 255 to get values between [0, 1]
  tensor = tensor.div(255);

  // 3.vi. Crop the image in the center to be a squared image
  const centerCrop = T.centerCrop(Math.min(width, height));
  tensor = centerCrop(tensor);

  // 3.vii. Resize the image tensor to 3 x 224 x 224
  const resize = T.resize(224);
  tensor = resize(tensor);

  // 3.viii. Normalize the tensor image with mean and standard deviation
  const normalize = T.normalize([0.485, 0.456, 0.406], [0.229, 0.224, 0.225]);
  tensor = normalize(tensor);

  // 3.ix. Unsqueeze adds 1 leading dimension to the tensor
  tensor = tensor.unsqueeze(0);

  // 3.x. Return the tensor shape [1, 3, 224, 224]
  return tensor.shape;
}
Let's double check the output of this function to make sure we are on the right track.
Go back to App.js and instead of just logging the image object, let's run the classifyImage function on the image object first and log the result instead.
- Import the
classifyImagefunction from theImageClassifier.jsfile. - Call
classifyImagefunction with theimagefrom the camera. - Log the
resultto the console.
// Import dependencies
import * as React from 'react';
import {StyleSheet, Text, View} from 'react-native';
import {Camera} from 'react-native-pytorch-core';
import {useSafeAreaInsets} from 'react-native-safe-area-context';
// 1. Import classify image function
import classifyImage from './ImageClassifier';

// App function to render a camera and a text
export default function App() {
  // Safe area insets to compensate for notches and bottom bars
  const insets = useSafeAreaInsets();

  // Function to handle images whenever the user presses the capture button
  async function handleImage(image) {
    // 2. Call the classify image function with the camera image
    const result = await classifyImage(image);
    // 3. Log the result from classify image to the console
    console.log(result);
    // Release the image from memory
    image.release();
  }

  return (
    <View style={StyleSheet.absoluteFill}>
      {/* Render camara and make it parent filling */}
      <Camera
        style={[StyleSheet.absoluteFill, {bottom: insets.bottom}]}
        // Add handle image callback on the camera component
        onCapture={handleImage}
      />
      {/* Label container with custom render style and a text */}
      <View style={styles.labelContainer}>
        <Text>Label will go here</Text>
      </View>
    </View>
  );
}

// Custom render style for label container
const styles = StyleSheet.create({
  labelContainer: {
    padding: 20,
    margin: 20,
    marginTop: 40,
    borderRadius: 10,
    backgroundColor: 'white',
  },
});
When you check the log ouput after capturing an image now, you should see [1,3,224,224], which is the tensor shape we need.
Now that the image has been converted to a properly formatted tensor, we are ready to run the machine learning model!
Run the Model
Let's head back to our ImageClassifier.js file and make some updates to the classifyImage function to actually classify the image.
For the changes we make to ImageClassifer.js you'll need to upload a file containing the labels for the different things the model knows how to classify.
Click here to do download the JSON file and then drag and drop it into the Snack window to upload it.
Here's a quick summary of the changes we are making to run the model:
- Import the
MobileModelto help us load our machine learning model - Import the class labels from the
ImageNetClasses.jsonfile. The JSON file is a mapping between image class indices to class labels. - Store the url for the model we'll be using in a variable for later access
- Create a variable for storing our
modeland set it to null initially - After we have the tensor all ready, check to see if our
modelis still null. If it is, initialize it by downloading it and loading it into memory. - Run the model on our image converted into a tensor by calling
model.forward(tensor). The return value will be aTensorof shape[1, 1000]where1the batch size (remember in this tutorial only 1 image is processed at a time) and1000are 1000 probability values (one probability value for each class in theImageNetClasses.json). - Find the index with the highest probability, which represents the most likely class detected in the image.
- Resolve the most likely image class by mapping the index to the class label and return it.
// 1. Add import for MobileModel from PlayTorch SDK
import {
  MobileModel,
  torch,
  torchvision,
  media,
} from 'react-native-pytorch-core';
// 2. Import the ImageNetClasses JSON file, which is used below to map the
// processed model result to a class label
import * as ImageNetClasses from './ImageNetClasses.json';

// Alias for torchvision transforms
const T = torchvision.transforms;

// 3. URL to the image classification model that is used in this example
const MODEL_URL =
  'https://github.com/facebookresearch/playtorch/releases/download/v0.1.0/mobilenet_v3_small.ptl';

// 4. Variable to hold a reference to the loaded ML model
let model = null;

// The classifyImage function that will process an image and return the top
// class label
export default async function classifyImage(image) {
  // Get image width and height
  const width = image.getWidth();
  const height = image.getHeight();

  // Convert image to blob, which is a byte representation of the image
  // in the format height (H), width (W), and channels (C), or HWC for short
  const blob = media.toBlob(image);

  // Get a tensor from image the blob and also define in what format
  // the image blob is.
  let tensor = torch.fromBlob(blob, [height, width, 3]);

  // Rearrange the tensor shape to be [CHW]
  tensor = tensor.permute([2, 0, 1]);

  // Divide the tensor values by 255 to get values between [0, 1]
  tensor = tensor.div(255);

  // Crop the image in the center to be a squared image
  const centerCrop = T.centerCrop(Math.min(width, height));
  tensor = centerCrop(tensor);

  // Resize the image tensor to 3 x 224 x 224
  const resize = T.resize(224);
  tensor = resize(tensor);

  // Normalize the tensor image with mean and standard deviation
  const normalize = T.normalize([0.485, 0.456, 0.406], [0.229, 0.224, 0.225]);
  tensor = normalize(tensor);

  // Unsqueeze adds 1 leading dimension to the tensor
  tensor = tensor.unsqueeze(0);

  // 5. If the model has not been loaded already, it will be downloaded from
  // the URL and then loaded into memory.
  if (model == null) {
    const filePath = await MobileModel.download(MODEL_URL);
    model = await torch.jit._loadForMobile(filePath);
  }

  // 6. Run the ML inference with the pre-processed image tensor
  const output = await model.forward(tensor);

  // 7. Get the index of the value with the highest probability
  const maxIdx = output.argmax().item();

  // 8. Resolve the most likely class label and return it
  return ImageNetClasses[maxIdx];
}
Since we are initializing the model the first time we run the classifyImage function, it will be slower. Subsequent runs will go much faster since they don't have to download the model or load it into memory.
If you do not wish to upload your model to a publicly accessible server, you may instead place the file in a directory of your choice and replace the line const filePath = await MobileModel.download(MODEL_URL); with const filePath = await MobileModel.download(require('./path/to/model.ptl'));.
Now that we are actually running the model, let's try it out in the PlayTorch app again and see what it logs. You should see a class label in the logs which is a word or list of words.
Excellent! It's logging the classification of each picture!
Display the Result
Lastly, let's update our UI to display the result of our model!
Go back to App.js and make the following changes:
- Create a state variable to store the
topClasswe get from the model - In the
handleImagefunction, set thetopClassstate variable to the result of theclassifyImagefunction - Change the text in the UI to display the
topClassstate variable instead of the placeholder text
// Import dependencies
import * as React from 'react';
import {StyleSheet, Text, View} from 'react-native';
import {Camera} from 'react-native-pytorch-core';
import {useSafeAreaInsets} from 'react-native-safe-area-context';
// Import classify image function
import classifyImage from './ImageClassifier';

// App function to render a camera and a text
export default function App() {
  // Safe area insets to compensate for notches and bottom bars
  const insets = useSafeAreaInsets();
  // 1. Create a React state to store the top class returned from the
  // classifyImage function
  const [topClass, setTopClass] = React.useState(
    "Press capture button to classify what's in the camera view!",
  );

  // Function to handle images whenever the user presses the capture button
  async function handleImage(image) {
    // Call the classify image function with the camera image
    const result = await classifyImage(image);
    // 2. Set result as top class label state
    setTopClass(result);
    // Release the image from memory
    image.release();
  }

  return (
    <View style={StyleSheet.absoluteFill}>
      {/* Render camara and make it parent filling */}
      <Camera
        style={[StyleSheet.absoluteFill, {bottom: insets.bottom}]}
        // Add handle image callback on the camera component
        onCapture={handleImage}
      />
      {/* Label container with custom render style and a text */}
      <View style={styles.labelContainer}>
        {/* 3. Change the text to render the top class label */}
        <Text>{topClass}</Text>
      </View>
    </View>
  );
}

// Custom render style for label container
const styles = StyleSheet.create({
  labelContainer: {
    padding: 20,
    margin: 20,
    marginTop: 40,
    borderRadius: 10,
    backgroundColor: 'white',
  },
});
And with that you have a working image classifer!