Question Answering
In this tutorial, you will build an app that can answer questions about a given source text using an on-device natural language processing (NLP) model.
Viewing this Demo
In order to view this demo download the PlayTorch app.
Preview
If you want a sneak peek at what you'll be building, run this Snack by scanning the QR code in the PlayTorch app!
Overview
We'll go through the following steps:
- Create a new project with Snack by Expo
- Run the project in the PlayTorch app
- Update the project UI
- Add PlayTorch dependencies
- Add BERT Tokenizer
- Create our question answerer
- Hook up the model and display results
Starting a New Project
We will be using a tool called Snack by Expo to write our code in the browser and then run it on our device. To learn more about Snack, visit this link.
Open a new tab in your web browser and navigate to snack.expo.dev.
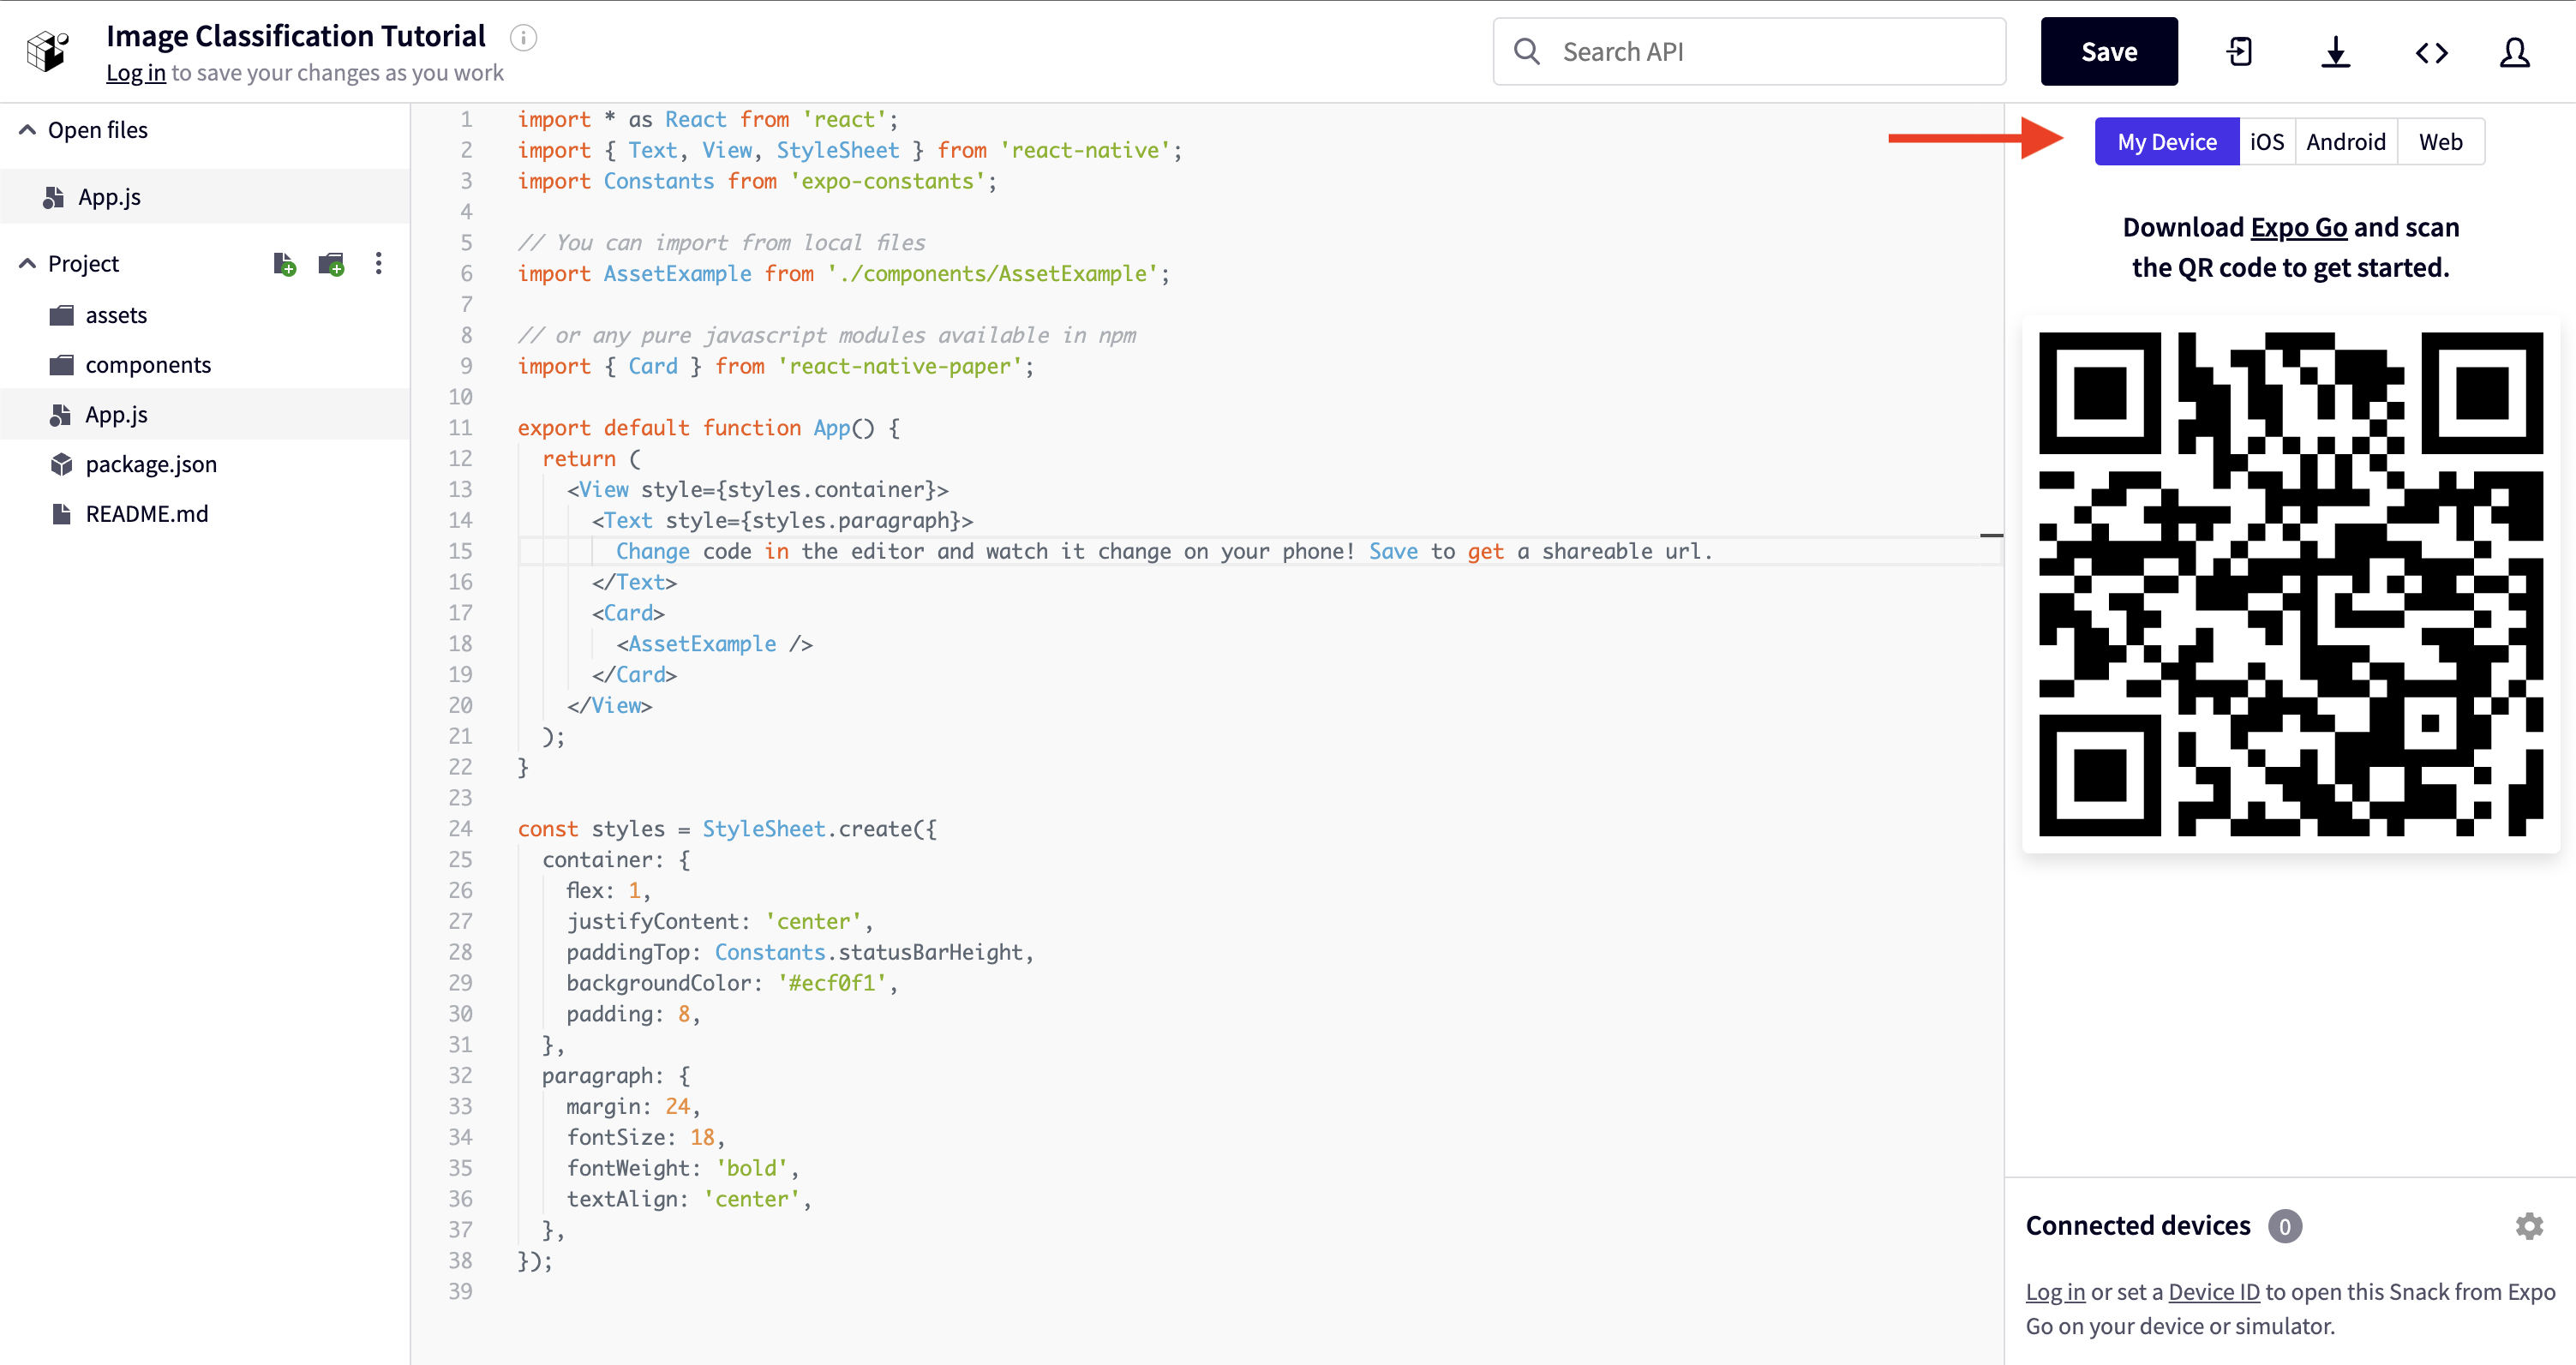
You will see a code editor with the App.js file open. On the right side of the window, you will see several options for running your code. It defaults to "Web", but let's select "My Device" so we can use the PlayTorch app to enable ML in our app.
Run the New Project
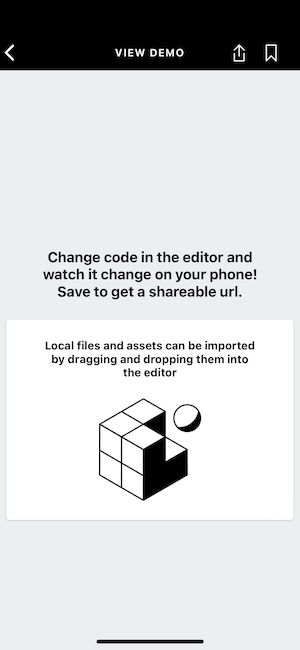
Open the PlayTorch app and from the home screen, tap "Scan QR Code".
If you have never done this before, it will ask for camera permissions. Grant the app camera permissions and scan the QR code from the right side of the Snack window.
If you haven't made any changes to the snack, you should see a screen that looks like this:
Try changing the backgroundColor to #800080 on line 29 and you will see that your app screen changes in real time to match it.
Update the Project UI
In this tutorial, we will focus on the machine learning aspects of PlayTorch development. In order to do so, we will skip over the details of the UI implementation and simply provide it for you.
Go ahead and copy and paste the following UI code into the App.js file in the Expo web editor:
import * as React from 'react';
import {useState} from 'react';
import {
  ActivityIndicator,
  KeyboardAvoidingView,
  Platform,
  TextInput,
  Text,
  ScrollView,
  StyleSheet,
} from 'react-native';
import {Button, Card} from 'react-native-paper';

const defaultSourceText = `Humpty Dumpty sat on a wall.
Humpty Dumpty had a great fall.
All the king's horses and all the king's men couldn't put Humpty together again.`;
const defaultQuestion = 'What did Humpty sit on?';

export default function App() {
  const [loading, setLoading] = useState(false);
  const [sourceText, setSourceText] = useState(defaultSourceText);
  const [question, setQuestion] = useState(defaultQuestion);
  const [answer, setAnswer] = useState('');

  return (
    <KeyboardAvoidingView
      behavior={Platform.OS === 'ios' ? 'padding' : 'height'}
      style={styles.container}>
      <ScrollView
        style={styles.container}
        contentContainerStyle={styles.contentContainerStyle}>
        <Card style={styles.card}>
          <Text style={styles.header}>Source Text</Text>
          <TextInput
            onChangeText={setSourceText}
            style={styles.paragraph}
            multiline>
            {sourceText}
          </TextInput>
        </Card>
        <Card style={styles.card}>
          <Text style={styles.header}>Question</Text>
          <TextInput
            onChangeText={setQuestion}
            style={styles.paragraph}
            multiline>
            {question}
          </TextInput>
        </Card>
        <Card style={styles.card}>
          <Text style={styles.header}>Answer</Text>
          {loading ? (
            <ActivityIndicator size="large" color="#FF5C00" />
          ) : (
            <Text style={styles.paragraph}>{answer}</Text>
          )}
        </Card>
        <Button
          style={styles.button}
          onPress={() => console.log('press')}
          color="#fff">
          Answer Question
        </Button>
      </ScrollView>
    </KeyboardAvoidingView>
  );
}

const styles = StyleSheet.create({
  container: {
    flex: 1,
    backgroundColor: '#ecf0f1',
  },
  contentContainerStyle: {
    paddingTop: 24,
    paddingBottom: 50,
    paddingHorizontal: 16,
  },
  paragraph: {
    fontSize: 18,
  },
  header: {
    marginBottom: 8,
    fontSize: 24,
    fontWeight: 'bold',
  },
  card: {
    padding: 24,
    marginBottom: 24,
    borderRadius: 16,
  },
  button: {
    color: '#fff',
    backgroundColor: '#000',
    borderRadius: 25,
  },
});
If you copied everything over correctly, when your app refreshes it should look like this:
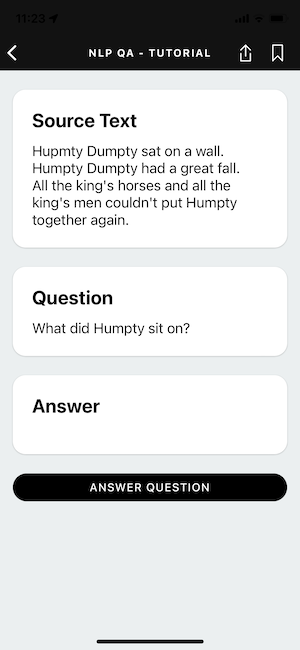
There are cards for each part of the process: Source Text, Question, and Answer.
Tapping on the Source Text and Question cards will bring up the keyboard and allow you to edit their contents.
The Answer Question button currently does not work, but we will fix that soon.
Add PlayTorch Dependencies
In order to add ML to this simple demo, we first need to add the PlayTorch dependencies.
On the left side of the Snack window, you will see a list of the files being used in your Snack. Open the one called package.json and replace the contents with the following:
{
  "dependencies": {
    "react-native-paper": "4.9.2",
    "react-native-pytorch-core": "0.2.0"
  }
}
This is a list of external libraries that we will be using to build our ML powered demo.
Add BERT Tokenizer
For this tutorial, we will be using a popular NLP model called BERT, short for Bidirectional Encoder Representations from Transformers.
In order to use BERT, we need a specific JSON file containing the vocabulary used to train the model. Download that file here.
The vocabulary is not a typical vocabulary for humans with words and definitions, but rather a set of "tokens" the model will use to break down the text we pass it into chunks that it can quickly process and understand.
Once you have downloaded that file, drag and drop it into the files browser on the left side of the Expo window to upload it.
Create a Question Answerer
Now that we have the extra dependencies loaded and the vocab file uploaded, we can use them to generate answers to the natural language questions asked in our UI.
Let's create a new file in the left pane of the Expo web editor window called QuestionAnswerer.js.
You can copy in the code below to the QuestionAnswerer.js file. Let's walk through what it does:
- Import the PlayTorch dependencies
- Import the
BERTVocab.jsonfile as an object calledBERT(the name of the NLP model we will be using in this tutorial) - Create a variable called
MODEL_URLto store the destination of our model - Create a variable called
modelto store our model once we instantiate it. This enables us to only load it once. For now we will set it tonulluntil we load the model later. - Create and export a function called
answerQuestionthat takes in thesourceText(where the answer should come from) and thequestion- Check if the
modelhas been loaded. If it hasn't been loaded, download it and then load it into memory. - Format the text to match the what the model is expecting
- Tokenize the input so the model knows how to read it
- Convert the tokens into a tensor that will be used by the model to calculate an answer
- Run the model. The
outputwill be an object containing logits (start_logitsandend_logits), which areTensors themselves. - Grab the index of the start of the generated answer
- Grab the index of the end of the generated answer
- Return the decoded response bound by the start and end index
- Check if the
// Add import for MobileModel from PlayTorch SDK
import {MobileModel, text, torch} from 'react-native-pytorch-core';
// Import the BERTVocab JSON file, which is used below to decode the model response
import * as BERT from './BERTVocab.json';

const tokenizer = new text.WordPieceTokenizer({vocab: BERT.vocab});

// URL to the image classification model that is used in this example
const MODEL_URL =
  'https://github.com/facebookresearch/playtorch/releases/download/v0.1.0/bert_qa.ptl';

// Variable to hold a reference to the loaded ML model
let model = null;

// The answerQuestion function that will synthesize an answer to the question asked from the source text
export default async function answerQuestion(sourceText, question) {
  // Load model
  if (model == null) {
    const filePath = await MobileModel.download(MODEL_URL);
    model = await torch.jit._loadForMobile(filePath);
  }

  // Pack
  const inputText = `[CLS] ${question} [SEP] ${sourceText} [SEP]`;
  const tokens = tokenizer.encode(inputText);

  // Inference
  const inputs = torch.tensor([tokens], {dtype: torch.int});
  const output = await model.forward(inputs);

  // Unpack
  const startId = output.start_logits.argmax().item();
  const endId = output.end_logits.argmax().item();
  return tokenizer.decode(tokens.slice(startId, endId + 1));
}
Now that we have code for answering questions, let's hook it up to our UI and test it.
Hook up the model and display results
Let's make some simple updates to make pressing the button in our UI actually trigger our question answering model.
See the simple updates in the code below and add them to your copy in the Expo web editor:
- Import our newly created
answerQuestionfunction - Create an async function called
handleAnswerButtonPressthat does the following:- Set the
loadingstate variable totrueto show the loading spinner in the "Answer" card - Call the
answerQuestionfunction, passing it the state variables forsourceTextandquestion - Set the
answerstate variable to the result of theanswerQuestionfunction - Set the
loadingstate variable tofalseto display the generated answer instead of the loading spinner in the "Answer" card
- Set the
- Change the
onPressfunction of the<Button>component to our newly createdhandleAnswerButtonPress
import * as React from 'react';
import {useState} from 'react';
import {
  ActivityIndicator,
  KeyboardAvoidingView,
  Platform,
  TextInput,
  Text,
  ScrollView,
  StyleSheet,
} from 'react-native';
import {Button, Card} from 'react-native-paper';
import answerQuestion from './QuestionAnswerer';

const defaultSourceText = `Humpty Dumpty sat on a wall.
Humpty Dumpty had a great fall.
All the king's horses and all the king's men couldn't put Humpty together again.`;
const defaultQuestion = 'What did Humpty sit on?';

export default function App() {
  const [loading, setLoading] = useState(false);
  const [sourceText, setSourceText] = useState(defaultSourceText);
  const [question, setQuestion] = useState(defaultQuestion);
  const [answer, setAnswer] = useState('');

  async function handleAnswerButtonPress() {
    setLoading(true);
    const response = await answerQuestion(sourceText, question);
    setAnswer(response);
    setLoading(false);
  }

  return (
    <KeyboardAvoidingView
      behavior={Platform.OS === 'ios' ? 'padding' : 'height'}
      style={styles.container}>
      <ScrollView
        style={styles.container}
        contentContainerStyle={styles.contentContainerStyle}>
        <Card style={styles.card}>
          <Text style={styles.header}>Source Text</Text>
          <TextInput
            onChangeText={setSourceText}
            style={styles.paragraph}
            multiline>
            {sourceText}
          </TextInput>
        </Card>
        <Card style={styles.card}>
          <Text style={styles.header}>Question</Text>
          <TextInput
            onChangeText={setQuestion}
            style={styles.paragraph}
            multiline>
            {question}
          </TextInput>
        </Card>
        <Card style={styles.card}>
          <Text style={styles.header}>Answer</Text>
          {loading ? (
            <ActivityIndicator size="large" color="#FF5C00" />
          ) : (
            <Text style={styles.paragraph}>{answer}</Text>
          )}
        </Card>
        <Button
          style={styles.button}
          onPress={handleAnswerButtonPress}
          color="#fff">
          Answer Question
        </Button>
      </ScrollView>
    </KeyboardAvoidingView>
  );
}

const styles = StyleSheet.create({
  container: {
    flex: 1,
    backgroundColor: '#ecf0f1',
  },
  contentContainerStyle: {
    paddingTop: 24,
    paddingBottom: 50,
    paddingHorizontal: 16,
  },
  paragraph: {
    fontSize: 18,
  },
  header: {
    marginBottom: 8,
    fontSize: 24,
    fontWeight: 'bold',
  },
  card: {
    padding: 24,
    marginBottom: 24,
    borderRadius: 16,
  },
  button: {
    color: '#fff',
    backgroundColor: '#000',
    borderRadius: 25,
  },
});
Now, when we press the "Answer Question" button, we will see a spinner briefly and then the answer will be populated. When it works, it should look like this:
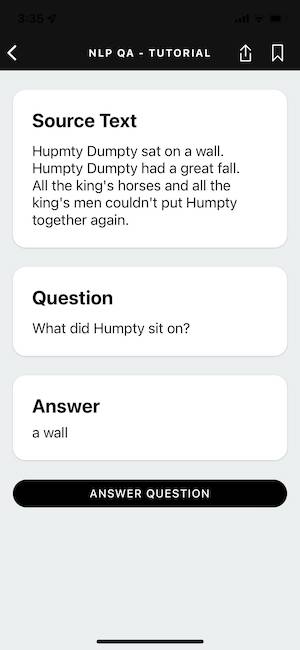
The first time you run the model, it will take several seconds because it has to download the model file and then load it into memory. Subsequent runs will be much faster.
You can test the model further by changing the source text and the question.
And with that you have successfully created an app using a Natural Language Processing model to generate answers to questions!