Question Answering
In this tutorial, you will integrate an on-device NLP (Natural Language Processing) model that can answer questions about a short paragraph of text.
If you haven't installed the PyTorch Live CLI yet, please follow this tutorial to get started.
If you get lost at any point in this tutorial, completed examples of each step can be found here.
Initialize New Project
Let's start by initializing a new project QuestionAnsweringTutorial with the PyTorch Live CLI.
npx torchlive-cli init QuestionAnsweringTutorial
The project init can take a few minutes depending on your internet connection and your computer.
After completion, navigate to the QuestionAnsweringTutorial directory created by the init command.
cd QuestionAnsweringTutorial
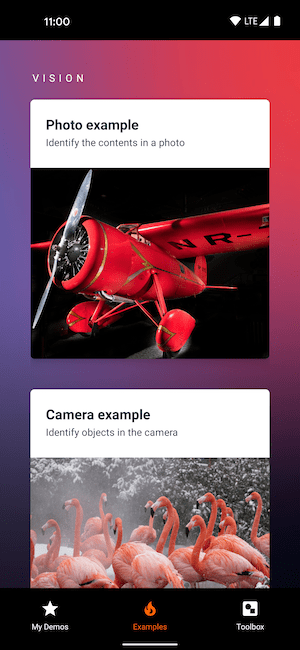
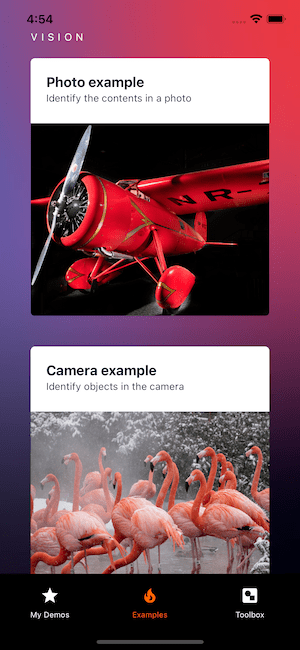
Run the project in the Android emulator or iOS Simulator
The run-android and run-ios commands from the PyTorch Live CLI allow you to run the question answering project in the Android emulator or iOS Simulator.
- Android
- iOS (Simulator)
npx torchlive-cli run-android
The app will deploy and run on your physical Android device if it is connected to your computer via USB, and it is in developer mode. There are more details on that in the Get Started tutorial.
npx torchlive-cli run-ios
Keep the app open and running! Any code change will immediately be reflected after saving.
Question Answering Demo
Let's get started with the UI for the question answering. Go ahead and start by copying the following code into the file src/demos/MyDemos.tsx:
The MyDemos.tsx already contains code. Replace the code with the code below.
import * as React from 'react';
import {Button, Text, TextInput, View} from 'react-native';
import {useSafeAreaInsets} from 'react-native-safe-area-context';

export default function QuestionAnsweringDemo() {
  // Get safe area insets to account for notches, etc.
  const insets = useSafeAreaInsets();
  return (
    <View style={{marginTop: insets.top, marginBottom: insets.bottom}}>
      <TextInput placeholder="Text" />
      <TextInput placeholder="Question" />
      <Button onPress={() => {}} title="Ask" />
      <Text>Question Answering</Text>
    </View>
  );
}
The initial code creates a component rendering two text inputs, a button, and a text with Question Answering.
- Android
- iOS (Simulator)
Style the component
Great! Let's, add some basic styling to the app UI. The styles will add a padding of 10 pixels for the container View component. It will also add padding and margin to the TextInput components, the ask Button and the output Text, so they aren't squeezed together. Lastly, the styles add a max height to the TextInput components to keep them in the screen size.
Note that we also set a max length of 360 on the first TextInput. The model we will be using only works with 360 characters at a time to be performant on a wide variety of mobile devices.
- Changes
- Entire File
@@ -1,16 +1,43 @@
 import * as React from 'react';
-import {Button, Text, TextInput, View} from 'react-native';
+import {Button, StyleSheet, Text, TextInput, View} from 'react-native';
 import {useSafeAreaInsets} from 'react-native-safe-area-context';

 export default function QuestionAnsweringDemo() {
   // Get safe area insets to account for notches, etc.
   const insets = useSafeAreaInsets();
   return (
-    <View style={{marginTop: insets.top, marginBottom: insets.bottom}}>
-      <TextInput placeholder="Text" />
-      <TextInput placeholder="Question" />
+    <View
+      style={[
+        styles.container,
+        {marginTop: insets.top, marginBottom: insets.bottom},
+      ]}>
+      <TextInput
+        multiline={true}
+        placeholder="Text"
+        placeholderTextColor="#CCC"
+        style={[styles.item, styles.input]}
+      />
+      <TextInput
+        placeholder="Question"
+        placeholderTextColor="#CCC"
+        style={[styles.item, styles.input]}
+      />
       <Button onPress={() => {}} title="Ask" />
-      <Text>Question Answering</Text>
+      <Text style={styles.item}>Question Answering</Text>
     </View>
   );
 }
+
+const styles = StyleSheet.create({
+  container: {
+    padding: 10,
+  },
+  item: {
+    margin: 10,
+    padding: 10,
+  },
+  input: {
+    borderWidth: 1,
+    color: '#000',
+  },
+});
import * as React from 'react';
import {Button, StyleSheet, Text, TextInput, View} from 'react-native';
import {useSafeAreaInsets} from 'react-native-safe-area-context';

export default function QuestionAnsweringDemo() {
  // Get safe area insets to account for notches, etc.
  const insets = useSafeAreaInsets();
  return (
    <View
      style={[
        styles.container,
        {marginTop: insets.top, marginBottom: insets.bottom},
      ]}>
      <TextInput
        multiline={true}
        placeholder="Text"
        placeholderTextColor="#CCC"
        style={[styles.item, styles.input]}
      />
      <TextInput
        placeholder="Question"
        placeholderTextColor="#CCC"
        style={[styles.item, styles.input]}
      />
      <Button onPress={() => {}} title="Ask" />
      <Text style={styles.item}>Question Answering</Text>
    </View>
  );
}

const styles = StyleSheet.create({
  container: {
    padding: 10,
  },
  item: {
    margin: 10,
    padding: 10,
  },
  input: {
    borderWidth: 1,
    color: '#000',
  },
});
- Android
- iOS (Simulator)
Add state and event handler
Next, add state to the text inputs, to keep track of the input content. React provides the useState hook to save component state. A useState hook returns an array with two items (or tuple). The first item (index 0) is the current state and the second item (index 1) is the set state function to update the state. In this change, it uses two useState hooks, one for the text state and one for the question state.
Add an event handler to the Ask button. The event handler handleAsk will be called when the button is pressed. For testing, let's log the text state and question state to the console (i.e., it will log what is typed into the text inputs).
- Changes
- Entire File
@@ -1,10 +1,22 @@
 import * as React from 'react';
+import {useState} from 'react';
 import {Button, StyleSheet, Text, TextInput, View} from 'react-native';
 import {useSafeAreaInsets} from 'react-native-safe-area-context';

 export default function QuestionAnsweringDemo() {
   // Get safe area insets to account for notches, etc.
   const insets = useSafeAreaInsets();
+
+  const [text, setText] = useState('');
+  const [question, setQuestion] = useState('');
+
+  async function handleAsk() {
+    console.log({
+      text,
+      question,
+    });
+  }
+
   return (
     <View
       style={[
@@ -13,16 +25,20 @@
       ]}>
       <TextInput
         multiline={true}
+        onChangeText={setText}
         placeholder="Text"
         placeholderTextColor="#CCC"
         style={[styles.item, styles.input]}
+        value={text}
       />
       <TextInput
+        onChangeText={setQuestion}
         placeholder="Question"
         placeholderTextColor="#CCC"
         style={[styles.item, styles.input]}
+        value={question}
       />
-      <Button onPress={() => {}} title="Ask" />
+      <Button onPress={handleAsk} title="Ask" />
       <Text style={styles.item}>Question Answering</Text>
     </View>
   );
import * as React from 'react';
import {useState} from 'react';
import {Button, StyleSheet, Text, TextInput, View} from 'react-native';
import {useSafeAreaInsets} from 'react-native-safe-area-context';

export default function QuestionAnsweringDemo() {
  // Get safe area insets to account for notches, etc.
  const insets = useSafeAreaInsets();

  const [text, setText] = useState('');
  const [question, setQuestion] = useState('');

  async function handleAsk() {
    console.log({
      text,
      question,
    });
  }

  return (
    <View
      style={[
        styles.container,
        {marginTop: insets.top, marginBottom: insets.bottom},
      ]}>
      <TextInput
        multiline={true}
        onChangeText={setText}
        placeholder="Text"
        placeholderTextColor="#CCC"
        style={[styles.item, styles.input]}
        value={text}
      />
      <TextInput
        onChangeText={setQuestion}
        placeholder="Question"
        placeholderTextColor="#CCC"
        style={[styles.item, styles.input]}
        value={question}
      />
      <Button onPress={handleAsk} title="Ask" />
      <Text style={styles.item}>Question Answering</Text>
    </View>
  );
}

const styles = StyleSheet.create({
  container: {
    padding: 10,
  },
  item: {
    margin: 10,
    padding: 10,
  },
  input: {
    borderWidth: 1,
    color: '#000',
  },
});
- Android
- iOS (Simulator)
Type into both text inputs, click the Ask button, and check logged output in terminal.
Run model inference
Fantastic! Now let's use the text and question and run inference on a question answering model.
We'll require the Distilbert SQuAD model (i.e., bert_qa.ptl) and add the QuestionAnsweringResult type for type-safety. Then, we call the execute function on the MobileModel object with the model as the first argument and an object with the text and question as the second argument.
The text and question states are concatenated into a sequence including two special tokens [CLS] and [SEP]. This sequence format is how the model was trained and is expected as input. The first
token of every sequence is always a special classification token (i.e., [CLS]). Sentence pairs are packed together into a single sequence put between a special separator token (i.e., [SEP]). A sequence ends with a [SEP] token.
It will use the bert_qa.ptl model that is already prepared for PyTorch Live. You can follow the Prepare Custom Model tutorial to prepare your own NLP model and use this model instead for question answering.
Don't forget the await keyword for the MobileModel.execute function call!
Last, let's log the inference result to the console.
- Changes
- Entire File
@@ -1,8 +1,15 @@
 import * as React from 'react';
 import {useState} from 'react';
 import {Button, StyleSheet, Text, TextInput, View} from 'react-native';
+import {MobileModel} from 'react-native-pytorch-core';
 import {useSafeAreaInsets} from 'react-native-safe-area-context';

+const model = require('../../models/bert_qa.ptl');
+
+type QuestionAnsweringResult = {
+  answer: string;
+};
+
 export default function QuestionAnsweringDemo() {
   // Get safe area insets to account for notches, etc.
   const insets = useSafeAreaInsets();
@@ -11,10 +18,18 @@
   const [question, setQuestion] = useState('');

   async function handleAsk() {
-    console.log({
-      text,
-      question,
-    });
+    const qaText = `[CLS] ${question} [SEP] ${text} [SEP]`;
+
+    const inferenceResult = await MobileModel.execute<QuestionAnsweringResult>(
+      model,
+      {
+        text: qaText,
+        modelInputLength: 360,
+      },
+    );
+
+    // Log model inference result to Metro console
+    console.log(inferenceResult);
   }

   return (
import * as React from 'react';
import {useState} from 'react';
import {Button, StyleSheet, Text, TextInput, View} from 'react-native';
import {MobileModel} from 'react-native-pytorch-core';
import {useSafeAreaInsets} from 'react-native-safe-area-context';

const model = require('../../models/bert_qa.ptl');

type QuestionAnsweringResult = {
  answer: string;
};

export default function QuestionAnsweringDemo() {
  // Get safe area insets to account for notches, etc.
  const insets = useSafeAreaInsets();

  const [text, setText] = useState('');
  const [question, setQuestion] = useState('');

  async function handleAsk() {
    const qaText = `[CLS] ${question} [SEP] ${text} [SEP]`;

    const inferenceResult = await MobileModel.execute<QuestionAnsweringResult>(
      model,
      {
        text: qaText,
        modelInputLength: 360,
      },
    );

    // Log model inference result to Metro console
    console.log(inferenceResult);
  }

  return (
    <View
      style={[
        styles.container,
        {marginTop: insets.top, marginBottom: insets.bottom},
      ]}>
      <TextInput
        multiline={true}
        onChangeText={setText}
        placeholder="Text"
        placeholderTextColor="#CCC"
        style={[styles.item, styles.input]}
        value={text}
      />
      <TextInput
        onChangeText={setQuestion}
        placeholder="Question"
        placeholderTextColor="#CCC"
        style={[styles.item, styles.input]}
        value={question}
      />
      <Button onPress={handleAsk} title="Ask" />
      <Text style={styles.item}>Question Answering</Text>
    </View>
  );
}

const styles = StyleSheet.create({
  container: {
    padding: 10,
  },
  item: {
    margin: 10,
    padding: 10,
  },
  input: {
    borderWidth: 1,
    color: '#000',
  },
});
The logged inference result is a JavaScript object containing the inference result including the answer and inference metrics (i.e., inference time, pack time, unpack time, and total time).
Can you guess what the text was for the returned answer?
Show the answer
Ok! So, we have an answer. Instead of having the end-user looking at a console log, we will render the answer in the app. We'll add a state for the answer using a React Hook, and when an answer is returned, we'll set it using the setAnswer function.
The user interface will automatically re-render whenever the setAnswer function is called with a new value, so you don't have to worry about calling anything else besides this function. On re-render, the answer variable will have this new value, so we can use it to render it on the screen.
The React.useState is a React Hook. Hooks allow React function components, like our QuestionAnsweringDemo function component, to remember things.
For more information on React Hooks, head over to the React docs where you can read or watch explanations.
- Changes
- Entire File
@@ -16,20 +16,22 @@

   const [text, setText] = useState('');
   const [question, setQuestion] = useState('');
+  const [answer, setAnswer] = useState('');

   async function handleAsk() {
     const qaText = `[CLS] ${question} [SEP] ${text} [SEP]`;

-    const inferenceResult = await MobileModel.execute<QuestionAnsweringResult>(
-      model,
-      {
-        text: qaText,
-        modelInputLength: 360,
-      },
-    );
-
-    // Log model inference result to Metro console
-    console.log(inferenceResult);
+    const {result} = await MobileModel.execute<QuestionAnsweringResult>(model, {
+      text: qaText,
+      modelInputLength: 360,
+    });
+
+    // No answer found if the answer is null
+    if (result.answer == null) {
+      setAnswer('No answer found');
+    } else {
+      setAnswer(result.answer);
+    }
   }

   return (
@@ -54,7 +56,7 @@
         value={question}
       />
       <Button onPress={handleAsk} title="Ask" />
-      <Text style={styles.item}>Question Answering</Text>
+      <Text style={styles.item}>{answer}</Text>
     </View>
   );
 }
import * as React from 'react';
import {useState} from 'react';
import {Button, StyleSheet, Text, TextInput, View} from 'react-native';
import {MobileModel} from 'react-native-pytorch-core';
import {useSafeAreaInsets} from 'react-native-safe-area-context';

const model = require('../../models/bert_qa.ptl');

type QuestionAnsweringResult = {
  answer: string;
};

export default function QuestionAnsweringDemo() {
  // Get safe area insets to account for notches, etc.
  const insets = useSafeAreaInsets();

  const [text, setText] = useState('');
  const [question, setQuestion] = useState('');
  const [answer, setAnswer] = useState('');

  async function handleAsk() {
    const qaText = `[CLS] ${question} [SEP] ${text} [SEP]`;

    const {result} = await MobileModel.execute<QuestionAnsweringResult>(model, {
      text: qaText,
      modelInputLength: 360,
    });

    // No answer found if the answer is null
    if (result.answer == null) {
      setAnswer('No answer found');
    } else {
      setAnswer(result.answer);
    }
  }

  return (
    <View
      style={[
        styles.container,
        {marginTop: insets.top, marginBottom: insets.bottom},
      ]}>
      <TextInput
        multiline={true}
        onChangeText={setText}
        placeholder="Text"
        placeholderTextColor="#CCC"
        style={[styles.item, styles.input]}
        value={text}
      />
      <TextInput
        onChangeText={setQuestion}
        placeholder="Question"
        placeholderTextColor="#CCC"
        style={[styles.item, styles.input]}
        value={question}
      />
      <Button onPress={handleAsk} title="Ask" />
      <Text style={styles.item}>{answer}</Text>
    </View>
  );
}

const styles = StyleSheet.create({
  container: {
    padding: 10,
  },
  item: {
    margin: 10,
    padding: 10,
  },
  input: {
    borderWidth: 1,
    color: '#000',
  },
});
- Android
- iOS (Simulator)
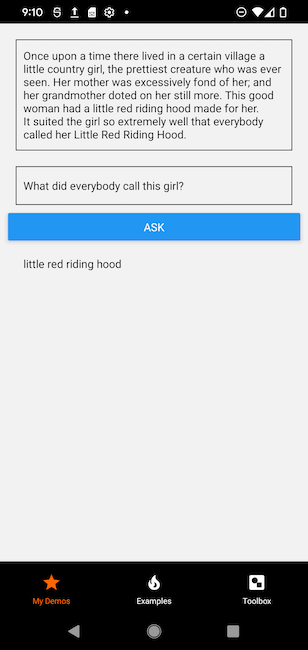
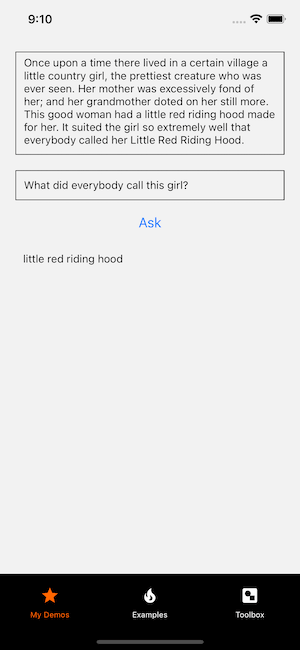
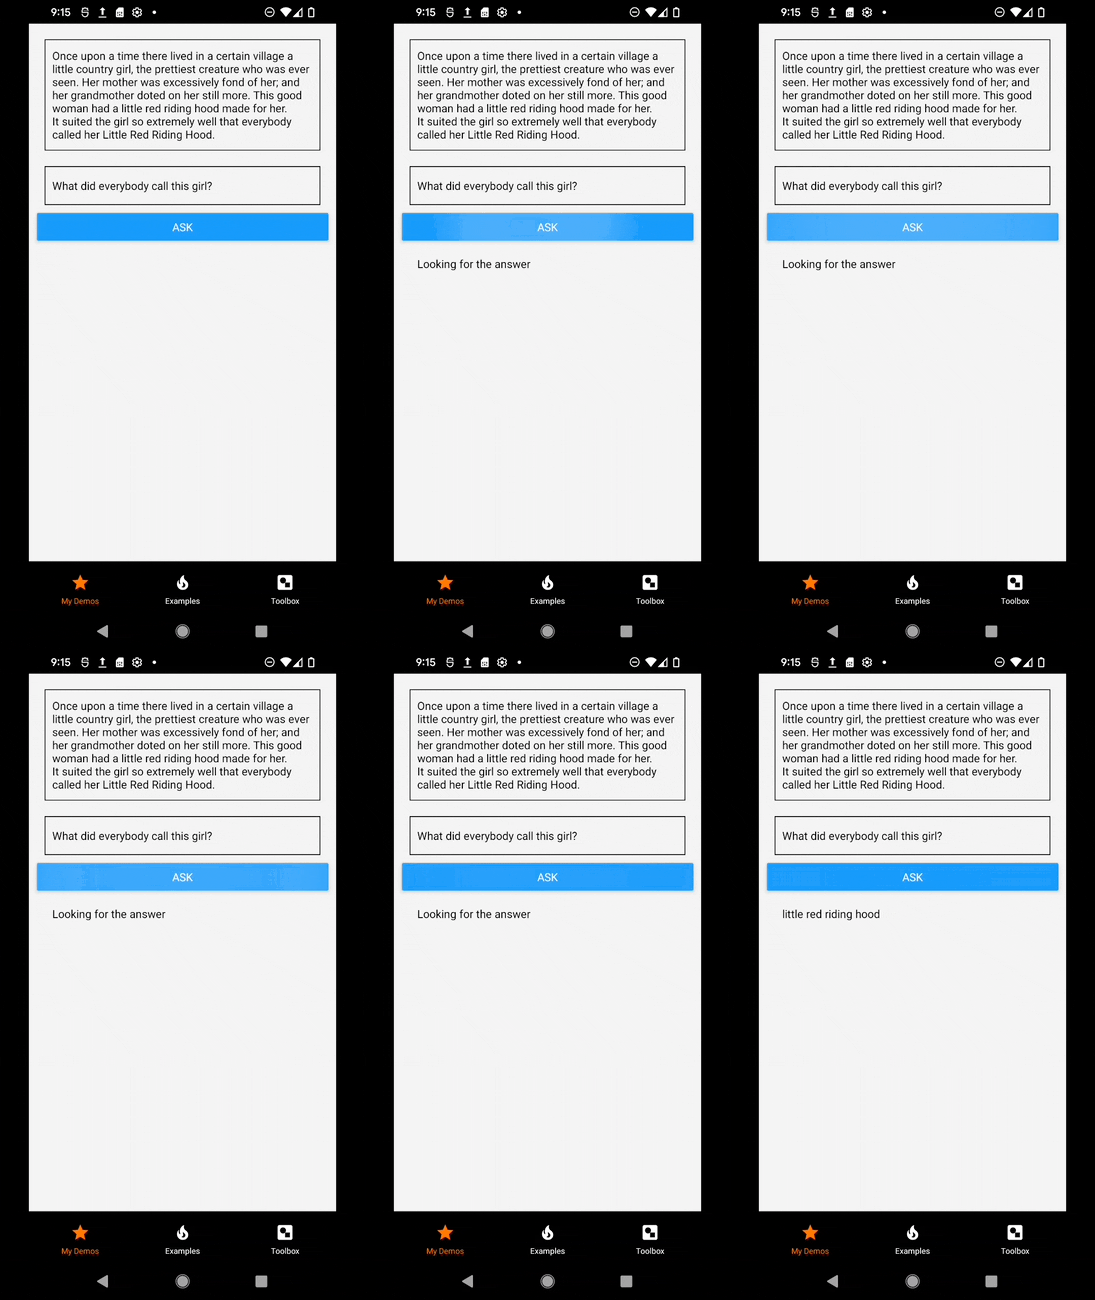
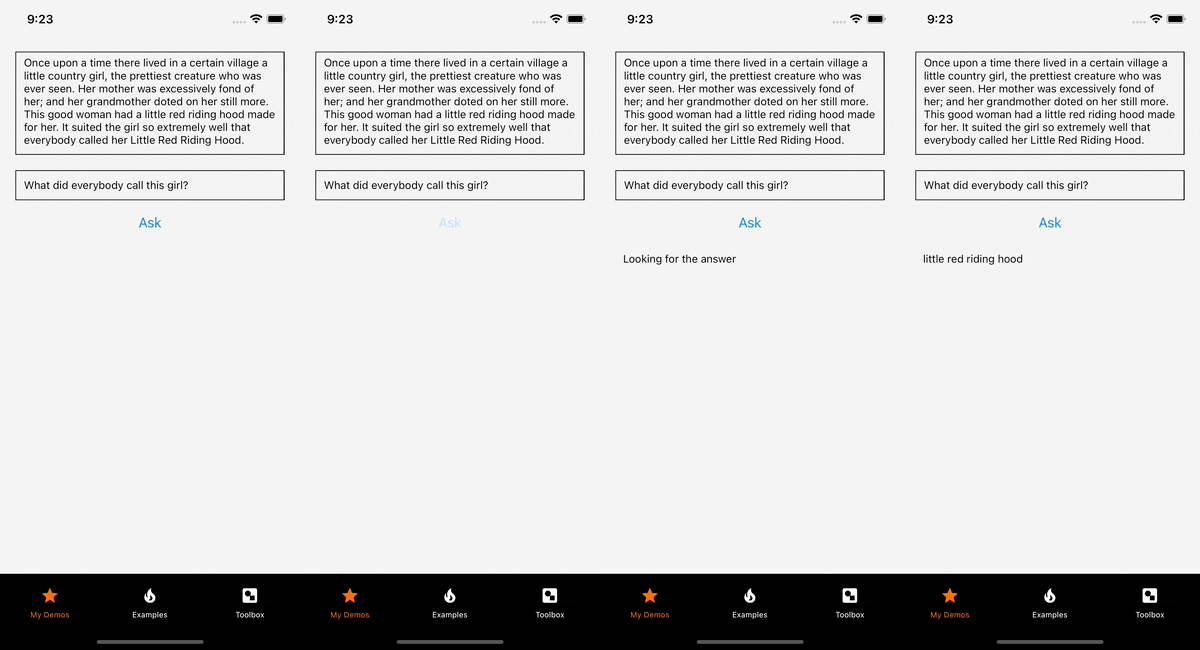
It looks like the model correctly answered the question!
Add user feedback
It can take a few milliseconds for the model to return the answer. Let's add a isProcessing state which is true when the inference is running and false otherwise. The isProcessing is used to render "Looking for the answer" while the model inference is running and it will render the answer when it is done.
- Changes
- Entire File
@@ -17,8 +17,11 @@
   const [text, setText] = useState('');
   const [question, setQuestion] = useState('');
   const [answer, setAnswer] = useState('');
+  const [isProcessing, setIsProcessing] = useState(false);

   async function handleAsk() {
+    setIsProcessing(true);
+
     const qaText = `[CLS] ${question} [SEP] ${text} [SEP]`;

     const {result} = await MobileModel.execute<QuestionAnsweringResult>(model, {
@@ -32,6 +35,8 @@
     } else {
       setAnswer(result.answer);
     }
+
+    setIsProcessing(false);
   }

   return (
@@ -56,7 +61,9 @@
         value={question}
       />
       <Button onPress={handleAsk} title="Ask" />
-      <Text style={styles.item}>{answer}</Text>
+      <Text style={styles.item}>
+        {isProcessing ? 'Looking for the answer' : answer}
+      </Text>
     </View>
   );
 }
import * as React from 'react';
import {useState} from 'react';
import {Button, StyleSheet, Text, TextInput, View} from 'react-native';
import {MobileModel} from 'react-native-pytorch-core';
import {useSafeAreaInsets} from 'react-native-safe-area-context';

const model = require('../../models/bert_qa.ptl');

type QuestionAnsweringResult = {
  answer: string;
};

export default function QuestionAnsweringDemo() {
  // Get safe area insets to account for notches, etc.
  const insets = useSafeAreaInsets();

  const [text, setText] = useState('');
  const [question, setQuestion] = useState('');
  const [answer, setAnswer] = useState('');
  const [isProcessing, setIsProcessing] = useState(false);

  async function handleAsk() {
    setIsProcessing(true);

    const qaText = `[CLS] ${question} [SEP] ${text} [SEP]`;

    const {result} = await MobileModel.execute<QuestionAnsweringResult>(model, {
      text: qaText,
      modelInputLength: 360,
    });

    // No answer found if the answer is null
    if (result.answer == null) {
      setAnswer('No answer found');
    } else {
      setAnswer(result.answer);
    }

    setIsProcessing(false);
  }

  return (
    <View
      style={[
        styles.container,
        {marginTop: insets.top, marginBottom: insets.bottom},
      ]}>
      <TextInput
        multiline={true}
        onChangeText={setText}
        placeholder="Text"
        placeholderTextColor="#CCC"
        style={[styles.item, styles.input]}
        value={text}
      />
      <TextInput
        onChangeText={setQuestion}
        placeholder="Question"
        placeholderTextColor="#CCC"
        style={[styles.item, styles.input]}
        value={question}
      />
      <Button onPress={handleAsk} title="Ask" />
      <Text style={styles.item}>
        {isProcessing ? 'Looking for the answer' : answer}
      </Text>
    </View>
  );
}

const styles = StyleSheet.create({
  container: {
    padding: 10,
  },
  item: {
    margin: 10,
    padding: 10,
  },
  input: {
    borderWidth: 1,
    color: '#000',
  },
});
- Android
- iOS
